In summary:
- Treating building control not as a bureaucratic hurdle but as a proactive risk-management framework is essential for a first-time pass.
- Success hinges on meticulous preparation, including photographic evidence and having all trade certificates ready before each key stage inspection.
- Understanding the critical inspection stages, from foundations to final completion, prevents costly remedial work and delays.
- Choosing between council (LABC) and private (RBCA) inspectors is a strategic decision based on your project’s complexity and timeline.
- Failing to secure a final completion certificate due to missing paperwork, especially for electrical work, can prevent a future property sale.
The dream of a self-build project—crafting a home to your exact specifications—can quickly become a nightmare when faced with a failed building control inspection. The dreaded enforcement notice, the spiralling costs of remedial work, and the endless delays can jeopardise the entire venture. Many self-builders focus intensely on getting planning permission, only to be blindsided by the rigorous, technical demands of the Building Regulations. The common advice is to simply “book inspections” and “keep good records,” but this dangerously oversimplifies a process that demands a strategic, proactive approach.
The reality is that navigating building control is not about ticking boxes. It is a critical quality assurance and risk-management process. The key to passing first time lies in shifting your mindset from reactive compliance to proactive evidence-gathering. It’s about understanding not just *what* the inspector needs to see, but *why*, and building a comprehensive evidence pack long before they set foot on site. This approach transforms the regulations from a set of restrictive rules into a framework for a higher quality, safer, and ultimately more valuable build.
This guide will walk you through that strategic framework. We will dissect the non-negotiable inspection stages, outline how to prepare an irrefutable evidence pack, explore the crucial choice between council and private inspectors, and examine common, costly failures so you can avoid them. The goal is to equip you with the knowledge to manage the process with confidence and secure that all-important completion certificate without a hitch.
Summary: A Strategic Guide to UK Building Control Inspections
- The 7 Building Control Inspection Stages You Cannot Skip on New Builds
- How to Prepare for Building Control Inspections With Photos and Certificates Ready
- Council Building Control vs Private Inspectors: Which Offers Faster Service
- The Foundation Depth Error That Failed Inspection and Required Excavation Restart
- How to Obtain Your Completion Certificate Within 8 Weeks of Final Inspection
- Why Your Approved Planning Permission Doesn’t Guarantee Legal Completion
- The Non-Certified Electrical Work That Prevents Property Sale Completion
- How to Verify if Advertised Square Footage Matches Reality Before Exchange
The 7 Building Control Inspection Stages You Cannot Skip on New Builds
Navigating a self-build project requires a clear understanding of the mandatory checkpoints where a Building Control Officer must be invited to inspect the work. These aren’t arbitrary; each stage represents a critical point of no return where mistakes, once covered up, become exponentially more expensive to rectify. You must notify your building control body before commencing work on site and agree on a full inspection schedule. While the exact plan can vary, a typical new build project in the UK involves several key phases that demand formal sign-off. These stages form the backbone of your compliance framework, ensuring the structural integrity, safety, and energy efficiency of your new home.
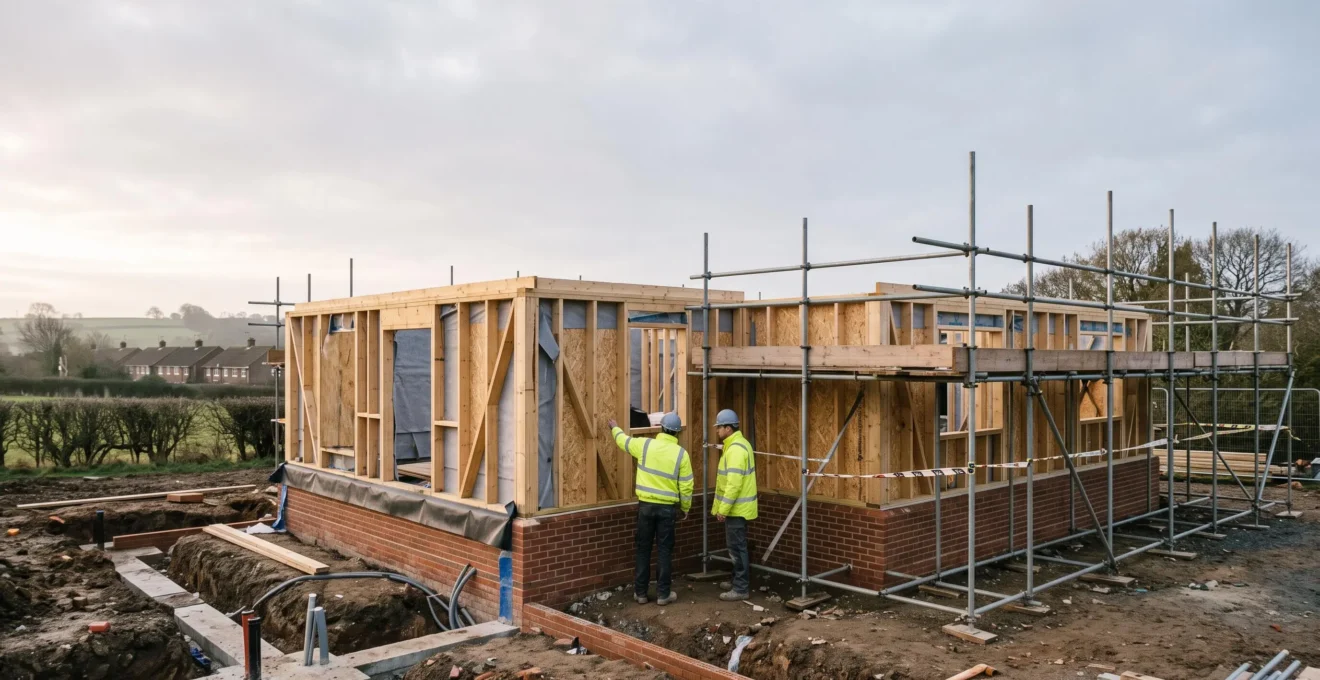
The core inspection stages you must prepare for are foundational to the entire project’s success. According to guidance from industry experts, for a self-build this typically includes foundations, drainage, the damp-proof course (DPC), the primary building structure (such as timber or steel frames), insulation and airtightness measures, critical fire-stopping, and the final completion inspection. Missing any one of these can halt progress and lead to enforcement action. For instance, the foundation inspection verifies depth and ground conditions before the concrete is poured, while the structural inspection confirms frame positioning before it is permanently enclosed by subsequent work.
Each stage serves a specific de-risking purpose. Key milestones include:
- Foundations & DPC: Inspection of open trenches before concreting, and checking the damp-proof course and any underfloor insulation.
- Drainage: Testing all below-ground drainage for leaks and correct falls before it is backfilled.
- Superstructure: Verifying the structural elements like steel beams, joists, and roof trusses are correctly installed as per the engineer’s drawings.
- Insulation & Airtightness: A crucial check before internal linings are fixed, ensuring compliance with Part L of the Building Regulations.
- Fire-Stopping: Inspecting compartment walls, floors, and service penetrations to ensure fire safety measures are correctly installed.
- Final Completion: The last visit to confirm all works are finished to standard and all necessary documentation is in place.
Failing to adhere to this sequence and call for inspections at the right time is one of the fastest ways to complicate your build and incur significant extra costs.
How to Prepare for Building Control Inspections With Photos and Certificates Ready
A first-time pass is rarely a matter of luck; it is the result of meticulous preparation. The single most important principle is to never conceal any work until the inspector has seen it and signed it off. This core tenet prevents having to undertake destructive and costly remedial work to expose a structural beam or a drainage run. To support this, a proactive documentation strategy is your most powerful tool. This means building an evidence file with time-stamped photographs and collating trade certificates as the project progresses, not scrambling to find them at the end. A well-organised file demonstrates professionalism and makes the inspector’s job easier, fostering a more collaborative relationship.
As the experts at Planning Permission Checker state unequivocally, this rule is non-negotiable:
Never cover up before it’s inspected. The cardinal rule of building control: don’t close a foundation, board over a beam, backfill a drain or plaster a wall until the inspector has seen it.
– Planning Permission Checker, Building control & completion certificates (England)
Your preparation should focus on pre-empting the inspector’s questions and providing clear, visual proof of compliance. This is particularly important for elements that will be hidden from view in the finished build. For example, you must photograph insulation installations, showing the material, thickness, and continuity of seals, before any plasterboard goes up. Similarly, you should water-test all drainage runs and photograph the process and the recorded falls before any backfilling occurs. This photographic log becomes an indispensable part of your project’s legal and technical record. It’s also wise to keep the work area tidy, as a cluttered site can physically prevent a proper inspection and create a poor impression.
Furthermore, you must be rigorous with structural elements. Common failures often relate to steelwork, so it’s critical to confirm final engineer calculations before ordering materials. Issues like incorrect steel sizes, missing padstones, or inadequate bearing lengths are frequent red flags. By having the engineer’s calculations and supplier specifications on hand, you provide the inspector with the necessary assurance that the installation is correct. This evidence-based approach transforms the inspection from a potential confrontation into a simple verification exercise.
Ultimately, the goal is to leave no room for doubt. A comprehensive file of photos, calculations, and certificates is the best insurance against delays and disputes.
Council Building Control vs Private Inspectors: Which Offers Faster Service
A critical strategic decision for any self-builder is who will oversee compliance: the Local Authority Building Control (LABC) or a private firm, now known as a Registered Building Control Approver (RBCA) following changes under the Building Safety Regulator in April 2024. This choice is not merely about speed but about the nature of the service, the working relationship, and the best fit for your project’s complexity. There is no single “better” option; the right choice depends entirely on your specific needs, timeline, and the intricacy of your build. Understanding the fundamental differences in their roles and operational models is key to making an informed decision that benefits your project.
The LABC operates as an impartial regulator with statutory enforcement powers. They can serve notices and compel compliance directly on site. Their relationship with you is formal and regulatory. In contrast, an RBCA (formerly Approved Inspector) is a private company you hire. Their approach is often more consultative and service-oriented, acting as a partner to help you achieve compliance. However, if a serious issue arises that cannot be resolved informally, an RBCA does not have enforcement powers; they are legally required to hand the project back to the local authority, which can introduce delays and complications. This distinction is crucial for risk assessment. A complex, fast-moving project may benefit from the flexibility and specialist input of an RBCA, while a straightforward build might be perfectly suited to the end-to-end involvement of the LABC.
The following table, based on an analysis of the two systems, highlights the key differences to consider:
| Criterion | LABC (Local Authority) | RBCA / Approved Inspector (Private) |
|---|---|---|
| Enforcement powers | Statutory powers to enforce compliance directly on site | Must hand the project back to the local authority if issues cannot be resolved informally |
| Relationship style | Impartial regulator | Consultative, service-oriented partner |
| Registration framework (since 6 April 2024) | Registered Building Inspectors under the Building Safety Regulator | Registered Building Control Approvers (RBCA) under the Building Safety Regulator |
| Typical fit | Straightforward, standard-build projects; council remains involved end-to-end | Complex or fast-moving projects needing flexible scheduling and specialist input |
Therefore, evaluate your project’s specific demands. If your design is unconventional or requires specialist knowledge (e.g., advanced sustainable technologies), the expertise of a private RBCA might be invaluable. If your build is standard and you prefer a single, consistent regulatory body from start to finish, the LABC is a reliable choice.
The Foundation Depth Error That Failed Inspection and Required Excavation Restart
Of all the potential failures in a self-build, an error in the foundations is arguably the most catastrophic. It is the literal base of your entire project, and getting it wrong means everything that follows is compromised. A failed foundation inspection doesn’t just result in a warning; it often means a complete halt to work and an order to dig everything out and start again. This is a financially and emotionally devastating setback, caused by a failure to correctly assess ground conditions before a single bucket of concrete is poured. The inspector’s role here is to prevent a latent defect that could cause structural failure years down the line, and they will not compromise on safety.
The primary cause of foundation failure is a mismatch between the design depth and the actual ground conditions. Factors like soil type (especially shrinkable clay), the proximity of trees (which draw moisture from the ground), and the local water table all dictate the required foundation depth. Simply assuming a standard depth is a recipe for disaster. This highlights the critical importance of a pre-emptive geotechnical survey or soil report, a step many try to skip to save costs but which ultimately acts as crucial insurance against a multi-thousand-pound error.
Case Study: The Proactive Step That Prevented a Costly Foundation Failure
A textbook example of proactive risk management involves a self-builder who, before finalising their foundation design, commissioned a thorough soil test. According to an analysis of self-build groundworks, the test revealed the presence of highly shrinkable clay on the site. Armed with this knowledge, their structural engineer was able to specify deeper foundations and a more robust drainage design appropriate for the challenging ground conditions. This foresight prevented an almost certain future of structural movement and cracking, and ensured the foundation inspection was passed first time, saving the project from catastrophic failure and delays.
Before you even consider calling the inspector, you must conduct your own rigorous checks. This pre-inspection audit is your best defence against a failed visit. The process involves physical inspection and cross-referencing documentation to ensure everything is perfect for the official review.
Your Action Plan: Foundation Pre-Pour Verification Checklist
- Match Depth to Site Conditions: Confirm that the excavated depth matches the requirements based on soil type and tree proximity. On clay soil near trees, foundations might need to be a metre deep or more, whereas stable ground may only require 600mm.
- Inspect the Open Trench: Personally walk the trench and look for red flags. Check for any water sitting in the bottom, soft spots, or signs of contaminated ground such as old pipes, rubble, or organic material that must be removed.
- Cross-Reference with Reports: Compare the excavated dig profile directly against the structural engineer’s drawings and the recommendations in your geotechnical/soil report. Do not proceed if there are discrepancies.
- Secure Contractor Sign-Off: Get written confirmation from your groundworks contractor that they have verified the depth and trench integrity against the plans *before* you call for the official inspection.
- Document Everything: Take clear, wide-angle photos of the open trenches, including a measuring rod showing the depth at several points. This becomes part of your evidence pack.
By treating the pre-pour phase with this level of diligence, you transform the official inspection into a formality rather than a gamble.
How to Obtain Your Completion Certificate Within 8 Weeks of Final Inspection
The Building Regulations completion certificate is the single most important document you will receive at the end of your project. It is the official declaration that your build has been inspected and is deemed to comply with the regulations in England. Without it, you may face difficulties selling or re-mortgaging the property in the future. Yet, many self-builders are frustrated by long delays in receiving this certificate, often long after the final inspection. The primary reason for this is almost always a failure to provide a complete package of supporting evidence to the building control body. The final site visit is just one part of the process; the paperwork is the other, equally important, half.
As compliance experts at Plans Made Easy highlight, the problem is rarely the quality of the final build itself.
The top reason a certificate is withheld is missing evidence at completion, not workmanship issues.
– Plans Made Easy, Building Regulations Completion Certificate: What to Know
To ensure your certificate is issued promptly, typically within the 8-week statutory period after the final inspection, you must prepare a “pre-completion pack.” This involves collating all necessary third-party certificates and test results *before* the final inspection takes place. Submitting this as a single, organised package demonstrates that all aspects of the build have been correctly certified by competent persons. The building control officer is unlikely to issue the final certificate until they have copies of all these prerequisite documents. Procrastinating on this collation is the most common cause of delay.
Your pre-completion pack must contain several key documents. These include:
- Part P Electrical Certificate: This is a non-negotiable requirement. An electrician registered under a competent person scheme must test the circuits once the mains power is connected and issue a formal Part P certificate.
- Gas Safety Certificate: If applicable, a certificate from a Gas Safe registered engineer for any boiler or gas appliance installation.
- Air Pressure Test Certificate: If a specific airtightness value was used in your project’s energy efficiency (SAP) calculations, this value must be verified by an on-site test, and the certificate submitted.
- Energy Performance Certificate (EPC): The final “as-built” EPC, which is generated using the final construction details and the air pressure test result.
- Certificates for Specialist Installations: This can include certifications for windows and doors (e.g., FENSA), solid fuel appliances (e.g., HETAS), or renewable technologies.
Treat this administrative task with the same seriousness as a physical construction stage. A complete and well-organised file is the final step in a professionally managed, compliant build.
Why Your Approved Planning Permission Doesn’t Guarantee Legal Completion
One of the most dangerous and costly assumptions a self-builder can make is that gaining planning permission is the end of the regulatory battle. It is not. Planning permission and Building Regulations approval are two entirely separate legal processes, governed by different legislation and assessed against different criteria. Planning permission deals with the principle of development: the use of land, the appearance of the building, and its impact on the surrounding area. Building Regulations, on the other hand, are concerned with the technical performance of the building itself: its structural safety, fire protection, energy efficiency, drainage, and accessibility. A design that is perfectly acceptable to the planning department may be completely non-compliant with Building Regulations.
This distinction is a frequent source of stress and confusion, as noted by industry veteran Mark Stevenson. His observation captures the sentiment of many who have been through the process:
Speak to someone halfway through a self build or renovation project, and they’ll probably say that dealing with building control is just as stressful as getting planning permission, and while the latter gets a lot more attention, the Building Regulations define the rules about how your project must be constructed.
– Mark Stevenson, Build It / Self-Build.co.uk
The risk arises because the drawings approved for planning are often not detailed enough for a Building Regulations assessment. They may show a window that looks aesthetically pleasing but fails to meet the U-value requirements for thermal performance or the criteria for a fire escape route. The ultimate responsibility for ensuring the design is compliant rests with you and your appointed designers. It is a critical error to assume your architect has automatically resolved all technical compliance issues within the planning drawings. You must de-risk this phase by asking direct and specific questions before the project goes out to tender.
To bridge this gap and prevent expensive redesigns later, you should proactively engage with your designer on the following points:
- Has the design been checked against Building Regulations? Ask for explicit confirmation that the approved planning drawings have been reviewed for technical compliance, even at a preliminary level.
- Can you confirm compliance for key elements? Request written confirmation of the proposed U-values for all windows and doors, and verification that the means of escape strategy is compliant for the approved layout.
- Who handles technical queries? Clarify how any questions or requested revisions from the building control body will be managed, who is responsible for providing the updated information, and what the associated costs might be.
- Which drawings will be submitted? Confirm which specific technical drawing package will form the basis of the formal Building Regulations application to ensure it is sufficiently detailed.
This proactive dialogue ensures that the project’s technical feasibility is considered from the outset, saving you from discovering a fundamental design flaw when you are already on site.
The Non-Certified Electrical Work That Prevents Property Sale Completion
Among the various trade certificates required for a completion certificate, the Part P electrical certificate holds a special significance. Notifiable electrical work in a domestic property in England must, by law, be carried out and certified by a registered electrician operating under a Competent Person Scheme (such as NICEIC or NAPIT), or it must be inspected and certified by the Local Authority Building Control. This is not optional. A failure to provide this specific certificate is one of the most common reasons a building control body will withhold final sign-off. More alarmingly, its absence can directly prevent the future sale of your property, as any diligent conveyancing solicitor acting for a buyer will demand it as proof of electrical safety.
The long-term consequence of cutting corners on electrical certification cannot be overstated. It is a problem that lies dormant for years, only to surface at the most inconvenient time—during a property transaction. As one expert guide warns, the pain of retroactively fixing this issue is significant.
When you sell, these certificates are asked for just like a completion certificate, so collect them at the time, because chasing a long-gone contractor years later is painful.
– Planning Permission Checker
To avoid this future crisis, you must manage the electrical certification process with absolute diligence during the build. This means never accepting verbal assurances or cash-in-hand work from an unregistered electrician for notifiable work. The risk is simply too high. Your process should be methodical, treating the certificate as a critical project deliverable, not just an administrative afterthought.
Follow this checklist to ensure your electrical certification is watertight:
- Engage a Registered Electrician: From the outset, confirm your chosen electrician is registered with a recognised Competent Person Scheme for Part P. Verify their registration online if necessary.
- Obtain the Final Certificate: The formal certificate can only be produced once the second-fix is complete and the circuits are live and can be fully tested. Ensure you receive this document promptly after the work is finished.
- File the Certificate Securely: Do not leave the certificate with the electrician’s other paperwork. File the original Part P certificate with your other essential completion documents, such as the EPC and structural warranties.
- Cross-Check the Details: Before filing, verify that all details on the certificate are correct: the installer’s registration number, the date of completion, and the exact property address. A simple typo can cause issues later.
By ensuring this crucial piece of evidence is correctly obtained and filed, you protect the long-term value and legality of your self-built home.
Key Takeaways
- Shift your mindset: Treat the Building Regulations not as a restrictive checklist, but as a proactive risk-management framework to improve the quality and safety of your build.
- Documentation is non-negotiable: A first-time pass depends on a meticulously organised evidence pack, including time-stamped photos of concealed work and all necessary trade certificates.
- The choice of inspector is strategic: Decide between the council (LABC) and a private firm (RBCA) based on your project’s complexity, timeline, and your preference for a regulatory versus a consultative relationship.
How to Verify if Advertised Square Footage Matches Reality Before Exchange
While the title of this section might seem more relevant to a buyer of an existing property, it holds a profound lesson for the self-builder. When your project is complete, how do you prove its value and specifications to a future buyer, valuer, or lender? The answer lies in the very documents that a compliant build process generates. The “advertised square footage” of your finished home isn’t just a number you put on a sales brochure; it is a legally defensible fact, substantiated by the final, as-built drawings and the Energy Performance Certificate (EPC) that are signed off as part of the building control completion process. Therefore, ensuring accuracy is not about marketing; it’s about creating a verifiable and correctly documented asset.
The gross internal area (GIA) is the standard measurement used for property valuation and comparison in the UK. This figure, calculated from your final architectural drawings, directly impacts your home’s perceived and actual market value. A discrepancy between your claimed GIA and the reality can lead to disputes during a sale or down-valuations from lenders. For a self-builder, the goal is to ensure that the final certified documents accurately reflect the home that has been built. This removes all ambiguity and provides a concrete basis for its valuation. Your completion certificate is the seal of approval that the build corresponds to the compliant plans.
The process of verification, therefore, happens intrinsically through the building control journey. Your final, as-built drawings, which must be submitted to the building control body, form the official record of the property’s dimensions. These drawings are then used to generate the final EPC, which also states the total floor area. These two documents, born from the compliance process, become the ultimate source of truth. Ensuring their accuracy is paramount. This involves a final check of the as-built drawings against the physical building before they are submitted for the last time, confirming that any on-site amendments have been correctly recorded. This diligence creates an unbroken chain of evidence from foundation trench to final sales particular.
By focusing on a compliant, well-documented build from day one, you are not just aiming to pass inspections. You are methodically constructing a valuable property whose key characteristics are backed by official, legally recognised evidence, ready for any future scrutiny.