Planning a home’s electrical system for 2030 and beyond requires a fundamental shift from simply adding sockets to engineering a ‘capacity-first’ infrastructure from the start.
- High-load devices like 7kW EV chargers and heat pumps are now the baseline, demanding dedicated circuits and correctly specified consumer units.
- Evolving safety laws (18th Edition) make RCD protection mandatory, turning compliance into a critical asset that prevents costly penalties and property sale failures.
Recommendation: Prioritise upgrading your consumer unit and planning for specific future loads over simply increasing outlet count. This foresight is the difference between a resilient home and one requiring expensive retrofits.
For decades, planning a home’s electrics was a simple exercise in predicting where you might place a lamp or a television. The primary concern was convenience. That era is definitively over. Today, a UK renovator or self-builder is designing an electrical system that must function as the central nervous system for a high-demand, technology-driven home. The conversation is no longer about adding a few extra sockets; it’s about accommodating the immense and specific loads of electric vehicles, solar PV, battery storage, and smart home systems.
Most guides offer the generic advice to “think about the future” or “install more outlets.” This misses the critical point. The real challenge—and opportunity—lies in the unseen infrastructure. It’s in the capacity of the consumer unit, the type of circuit protection used, and the strategic placement of data cabling. Getting this foundation right means creating a home that is not just functional for today, but resilient, compliant, and ready for the technological demands of 2030 without the need for disruptive and costly rewiring.
But if the key isn’t just more sockets, what is it? The answer is a ‘capacity-first’ approach. This means viewing your electrical system not as a series of endpoints, but as a power distribution network designed to handle specific, predictable future loads. It’s about understanding that an EV charger isn’t just another appliance; it’s a load equivalent to an entire electric shower, running for hours. This guide moves beyond the platitudes to provide a strategic framework. We will explore the mandatory legal requirements for safety, how to correctly size your system’s core, plan for both aesthetics and upgradeability, and ultimately connect your electrical decisions to the high-value goal of achieving a superior Energy Performance Certificate (EPC) rating.
This article provides a detailed roadmap for making these crucial decisions. Follow along as we break down the essential components of a truly future-proof electrical installation, ensuring your project is safe, compliant, and ready for the next decade of innovation.
Contents: A Strategic Guide to Future-Proofing Your Home’s Electrics
- Why Every UK Electrical Installation Now Needs RCD Protection by Law
- How to Upsize Your Consumer Unit to Support 7kW EV Charging at Home
- Surface Conduit vs Chased-In Cables: Which Wiring Method Suits Your Listed Building
- The Non-Certified Electrical Work That Prevents Property Sale Completion
- How to Plan Socket and USB Outlet Locations Before Plastering Starts
- How to Compensate for Remote Location With £300 of Emergency Preparedness
- How to Determine if Your Project Needs Building Regulations Approval in 5 Minutes
- How to Insulate a UK Home to Achieve EPC Rating B for Under £6,000
Why Every UK Electrical Installation Now Needs RCD Protection by Law
Under the latest 18th Edition of the IET Wiring Regulations (BS 7671), the use of Residual Current Devices (RCDs) has transitioned from a best practice to a mandatory legal requirement for most circuits in UK homes. An RCD is a life-saving device designed to disconnect power in milliseconds if it detects an earth fault, such as when a person touches a live part. This isn’t just a technical detail; it’s the new baseline for electrical safety. For landlords, an Electrical Installation Condition Report (EICR) that finds a lack of adequate RCD protection on circuits will result in a C2 ‘Potentially Dangerous’ coding, meaning the issue must be rectified within 28 days under strict regulations.
However, not all RCDs are created equal, especially when planning for future tech. The rise of devices with sophisticated electronics, like EV chargers and heat pumps, introduces the risk of ‘DC leakage’ current. This type of current can blind a standard ‘Type AC’ RCD, rendering it useless when you need it most. Therefore, planning a future-proof system requires selecting the correct RCD type for the intended load. A circuit for an EV charger, for instance, often requires a Type A or even a Type B RCD to function safely and reliably.
This table from Hager UK provides a clear overview of how different RCD types handle DC leakage, highlighting why this specification is critical for modern, high-tech circuits.
| RCD Type | DC Leakage Behaviour | Typical Domestic Application |
|---|---|---|
| Type AC | Can be blinded by smooth DC leakage | Standard circuits only, not for EV chargers |
| Type A | Remains functional up to 6mA DC | Chargers with a built-in 6mA RDC-DD |
| Type F | Tolerates certain pulsating DC waveforms | Circuits with variable frequency loads |
| Type B | Detects and disconnects on smooth DC | EV chargers without integrated DC detection, solar inverters |
Your EICR Compliance Checklist: What to Verify
- Visual Check: Confirm all accessible wiring, sockets, switches, and fittings are undamaged and securely fixed.
- Circuit Testing: Ensure your electrician has tested every circuit for insulation resistance, earth fault loop impedance, and correct polarity.
- Earthing and Bonding: Verify that gas and water pipes are correctly bonded to the main earthing terminal to prevent electric shock risk.
- Consumer Unit Integrity: Check that the consumer unit is in good condition, all circuits are clearly labelled, and the enclosure is of a suitable fire-resistant material (metal, as per modern standards).
- RCD Operation: Demand a test of all RCDs to confirm they trip within the required safety time limits under a simulated fault.
How to Upsize Your Consumer Unit to Support 7kW EV Charging at Home
The single biggest change to domestic electrical demand is the home EV charger. A standard 7kW charger is not like plugging in a kettle; it’s a continuous, high-load device. A detailed analysis shows that a 7.4kW EV charger draws roughly 32A, a current comparable to a powerful electric shower or a large cooker. Adding this sustained load to an older, undersized consumer unit without proper planning is a recipe for overloading your main fuse and creating a significant safety hazard. This is why a consumer unit upgrade is often the first, and most critical, part of any major renovation or EV charger installation.
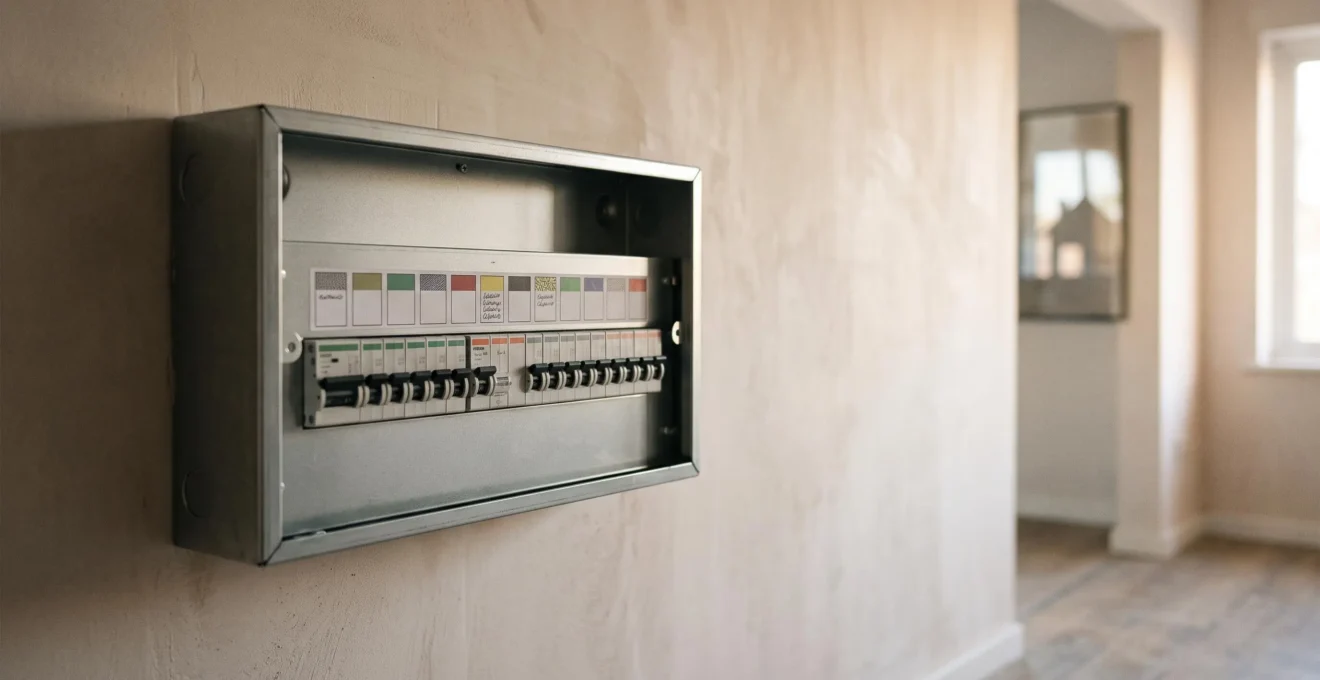
A modern consumer unit isn’t just ‘bigger’; it’s smarter and safer. It will be a metal-clad, fire-resistant enclosure compliant with the 18th Edition regulations, featuring a main switch, Surge Protection Device (SPD), and dual RCDs (or individual RCBOs per circuit). The key to future-proofing is ensuring it has enough spare ‘ways’ (slots) not just for today’s needs but for tomorrow’s. This means planning for a dedicated circuit for the EV charger, another for a future solar PV or battery system, and perhaps another for an air-source heat pump. A ‘full’ consumer unit upon completion of a renovation is a sign of poor planning.
Case Study: The Proactive Upgrade
A homeowner preparing to install a Myenergi Zappi charger and a home battery system discovered their consumer unit was already at full capacity, complicated by an existing solar installation. Instead of trying to add a secondary sub-panel, they opted for a full consumer unit upgrade. This not only provided a clean, organised panel with dedicated, correctly protected circuits for the new high-load devices but also uncovered several hidden wiring defects in the old board. The result was a safer, more reliable system with ample spare ways for any future projects, turning a necessity into a long-term asset.
Upgrading isn’t always necessary, however. If your consumer unit was installed after 2015, has spare capacity, and already features Type A RCDs, you may only need to add the new circuit. An electrician can perform a load calculation to confirm your existing 80A or 100A main supply has enough headroom. But for most properties undergoing significant renovation, starting with a new, generously sized consumer unit is the most strategic and cost-effective decision in the long run.
Surface Conduit vs Chased-In Cables: Which Wiring Method Suits Your Listed Building
When rewiring a property, especially a listed building or one with solid stone or brick walls, the method of running cables becomes a crucial decision. The two primary options are chasing cables into the wall or using surface-mounted conduit. Chasing involves cutting a channel into the wall, laying the cable, and then replastering. This provides a clean, invisible finish but is a destructive, dusty, and often forbidden process in properties with historical or architectural significance. English Heritage and other conservation bodies strongly advise against disturbing original fabric unless absolutely necessary.
This is where surface conduit comes into its own. Once seen as a purely industrial solution, modern conduit systems in finishes like galvanised steel, copper, or polished brass have become an aesthetic statement. They allow for the entire electrical system to be installed on the surface of the walls with minimal physical impact on the building’s structure. This method is not only sympathetic to the building’s history but also offers incredible future flexibility. If a new socket or circuit is needed in a decade, an electrician can simply extend the existing conduit run without any need for chasing, plastering, or redecorating.
This macro photograph shows the detail and texture of a high-quality brass surface conduit fitting, demonstrating how it can become a deliberate design feature rather than a compromise.
For renovators of listed properties, the choice is often made for them by planning constraints. But for those with solid walls or a desire for a flexible, industrial-inspired aesthetic, conduit offers a compelling blend of practicality and style. While the initial material cost of high-end conduit can be higher than standard PVC-sheathed cable, the labour savings from avoiding chasing and replastering can often balance the overall project budget, especially when factoring in the long-term benefit of easy upgradeability.
The Non-Certified Electrical Work That Prevents Property Sale Completion
One of the most significant financial risks in a renovation project is undertaking electrical work that is not correctly certified. In the UK, most electrical work beyond simple like-for-like replacements is ‘notifiable’ under Part P of the Building Regulations. This means it must be carried out by a registered electrician who can issue a Building Regulations Compliance Certificate. Without this certificate, the local authority is not aware the work was done to standard, and it creates a major red flag for any future property sale.
When a property is being sold, the buyer’s solicitor will ask for certificates for any electrical work carried out. If you’ve installed a new circuit, moved a consumer unit, or rewired a kitchen without the proper Part P certificate, the sale can be severely delayed or even fall through. The buyer’s lender may refuse to release funds, or you may be forced to pay for expensive indemnity insurance, which doesn’t fix the underlying problem. In a worst-case scenario, you might have to pay a certified electrician to inspect, test, and potentially redo the work to bring it up to standard and get it certified retrospectively—a costly and stressful process.
The consequences extend beyond conveyancing. For landlords, ignoring a ‘Potentially Dangerous’ (C2) or ‘Immediately Dangerous’ (C1) finding on an EICR can lead to severe legal and financial penalties, as demonstrated in the following case.
Case Study: The Cost of Ignoring an EICR
A landlord who received an EICR report with several C2 defects, including a lack of RCD protection, failed to act on the findings. Believing the issues were minor, they delayed the remedial work. The local authority, upon discovering the non-compliance, issued a financial penalty of £12,000 and served an enforcement notice requiring the immediate completion of all necessary repairs. This case highlights that certification and compliance are not bureaucratic hoops but legally enforceable standards with significant financial consequences.
How to Plan Socket and USB Outlet Locations Before Plastering Starts
The “first fix” stage of a renovation, before the plasterboard or wet plaster goes on, is the one-time golden opportunity to plan for every conceivable power and data need. Once the walls are closed, adding new outlets or cables becomes a messy and expensive job. The guiding principle here should be abundance and foresight. As David Pedigo of the technology association CEDIA wisely puts it:
I’ve never heard anyone say, ‘Man, I just pulled too many wires in this house.’
– David Pedigo, Senior Director of Learning and Emerging Technology, CEDIA, NewHomeSource.com
Planning socket locations means thinking in zones. In the kitchen, consider where small appliances will live and install outlets on the wall above the worktop, but also think about a powered island with integrated USB-C ports for charging devices. In the living room, plan a cluster of sockets and data points (Ethernet, aerial) where the media unit will go, and consider floor sockets for lamps in the middle of the room. In bedrooms, place sockets on either side of the bed and consider dedicated outlets at desk height. Always add more than you think you need; a double socket is only marginally more expensive to install than a single at the first-fix stage.
Future-proofing today is as much about data as it is about power. While Wi-Fi is convenient, it is not a substitute for the speed and reliability of a wired connection for stationary devices like smart TVs, desktop computers, and gaming consoles. Key steps for a truly connected home include:
- Install CAT6 Cables: Run at least one CAT6 Ethernet cable to every room, especially to locations for TVs, home offices, and potential Wi-Fi access points.
- Use Conduits: Where possible, run plastic conduit to key locations. This creates an empty channel that allows for easy pulling of new cables (like fiber-optic) in the future without opening up walls.
- Provide Neutral Wires: Many smart switches and dimmers require a neutral wire to function. Ensure your electrician provides a neutral at every switch location, even if you are installing standard switches initially. This is a crucial step for future smart home upgrades.
- Pre-wire for everything: Think about future security cameras, in-ceiling speakers, or motorised blinds. Running the basic speaker or low-voltage cable now is incredibly cheap, even if the devices themselves aren’t installed for years.
How to Compensate for Remote Location With £300 of Emergency Preparedness
For properties in remote or rural areas, electrical resilience is not a luxury; it’s a necessity. Power cuts can be more frequent and last longer due to storm damage or difficult access for repair crews. While a full-scale backup generator can cost thousands, a carefully considered emergency preparedness kit, costing around £300, can provide a critical buffer of light, communication, and basic comfort during an outage.
The focus of this kit is electrical self-sufficiency for the first few hours or even days. The core component is a reliable source of portable power. A high-capacity portable power station (around 300-500Wh) is the modern equivalent of a box of candles. It can be charged from the mains when power is on and then used to run essential devices during an outage. Here’s a breakdown of a practical £300 kit:
- Portable Power Station (~£180): Look for a model with at least 300Wh capacity, multiple USB outputs for charging phones and tablets, and at least one standard 3-pin AC outlet for running a low-power device like a router or an energy-efficient LED lamp.
- High-Quality LED Lanterns and Headtorches (~£40): Invest in several battery-powered or rechargeable LED lights. Headtorches are particularly useful as they keep your hands free. Avoid relying solely on your phone’s torch to preserve its battery for communication.
- Battery-Powered/Wind-Up Radio (~£20): In a prolonged outage, mobile networks can fail. An AM/FM radio is a reliable way to get news and updates from local stations. Many models also include a built-in torch and a USB port for trickle-charging a phone.
- USB Power Banks (~£30): A couple of fully charged 10,000mAh power banks provide an extra layer of security for keeping mobile phones and other small devices running.
- Car Power Inverter (~£30): A simple device that plugs into your car’s 12V socket and provides a mains AC outlet. If you can safely run your car, you have a mini-generator capable of charging laptops and power stations.
This modest investment provides peace of mind and ensures a power cut is an inconvenience, not a crisis. It keeps you connected, informed, and safe until the grid is restored. The key is to have everything charged and ready in an easily accessible location.
How to Determine if Your Project Needs Building Regulations Approval in 5 Minutes
One of the most common points of confusion for renovators is figuring out which electrical works require formal approval from the local authority’s Building Control department. In England and Wales, this is governed by Part P of the Building Regulations. Getting this wrong can lead to the compliance issues discussed earlier. Fortunately, you can determine if your work is ‘notifiable’ with a quick 5-minute assessment.
The core principle of Part P is that any new installation or work in a ‘special location’ is notifiable. Follow this simple checklist to see where your project falls:
Part P Notification Checklist:
- Is the work in a ‘special location’?
A special location is defined as a room containing a bath or shower (a bathroom), a swimming pool, or a sauna. Any work here, even minor alterations, is generally notifiable unless it is a like-for-like replacement of an accessory. If yes, your work is notifiable. If no, proceed to the next question.
- Are you installing a completely new circuit?
This means running a new cable from the consumer unit to a new outlet, appliance, or lighting point. Examples include a new circuit for an EV charger, an electric shower, a cooker, or a new ring circuit for a new extension. If yes, your work is notifiable. If no, proceed.
- Are you replacing the consumer unit?
Changing the ‘fuse box’ is a major alteration to the core of the installation. If yes, your work is notifiable.
- Are you altering or extending an existing circuit in any room *other than* a kitchen or special location?
This includes adding a new socket to an existing ring circuit in a bedroom or living room, or adding a new light fitting. In general, this type of minor addition is not notifiable.
- Are you altering or extending an existing circuit within a kitchen?
The kitchen is a high-risk area. If your work involves adding new outlets or altering the wiring within the kitchen zone (as defined in the regulations), it is likely to be notifiable work.
If you answered ‘yes’ to questions 1, 2, 3, or 5, your project requires Building Regulations approval. The simplest way to achieve this is to use an electrician registered with a Competent Person Scheme (like NICEIC or NAPIT). They can self-certify their work and will handle all the necessary paperwork on your behalf, providing you with the essential compliance certificate upon completion.
Key Takeaways
- Mandatory RCDs: 18th Edition regulations require RCD protection on most domestic circuits; failure to comply can halt property sales and incur penalties.
- Plan for High Loads: Future-proofing means designing for specific high-demand items like 7kW EV chargers (a ~32A load), not just adding more sockets.
- Certification is Non-Negotiable: All major electrical work must be certified under Part P of the Building Regulations to be legal and ensure your property is saleable.
How to Insulate a UK Home to Achieve EPC Rating B for Under £6,000
Achieving a high Energy Performance Certificate (EPC) rating is no longer a niche interest; it’s a primary driver of property value, lower running costs, and mortgage eligibility. Reaching an ‘EPC B’ rating places a property in the top tier of energy efficiency. While it may seem like a daunting target, for a typical UK semi-detached house, this goal can often be reached with a strategic investment of under £6,000, provided the electrical system is prepared to support the necessary upgrades.
The journey to EPC B is a “fabric-first” approach, focusing on reducing heat loss before upgrading heating systems. The most cost-effective measures are:
- Loft Insulation: Topping up loft insulation from 100mm to the recommended 270-300mm is the cheapest and fastest win. (Approx. Cost: £500 – £900)
- Cavity Wall Insulation: If your home was built between the 1920s and 1990s, it likely has uninsulated cavity walls. Filling them is a highly effective one-day job. (Approx. Cost: £1000 – £1500)
- High-Efficiency Heating System: This is the largest investment and where the electrical system becomes critical. Replacing an old G-rated gas boiler with a modern A-rated condensing boiler is a significant step. However, for a true leap in efficiency and to be ready for the 2030s, installing an Air Source Heat Pump (ASHP) is the ultimate goal. An ASHP runs on electricity and requires a dedicated, high-capacity circuit run directly from a modern consumer unit. (Approx. Cost: £3,000 – £7,000+ for a boiler; much higher for ASHP, often offset by grants).
The sub-£6,000 target is achievable by focusing on insulation and a boiler upgrade. However, the ‘future-proof’ strategy is to ensure your new electrical system has the capacity to handle an ASHP in the future, even if you are only installing a boiler today. This means having that spare way in the consumer unit and a planned cable route.
By combining insulation measures with a heating system upgrade supported by a robust electrical installation, you create a powerful synergy. The insulation reduces the overall heating demand, allowing the new boiler or heat pump to operate more efficiently and at a lower cost. This holistic approach is what transforms a property’s energy performance, delivering long-term savings and adding tangible value that is clearly reflected in an EPC B rating.
To ensure your renovation project delivers a home that is safe, compliant, and truly ready for the future, the next logical step is to consult a registered electrician to design a system based on these forward-thinking principles.