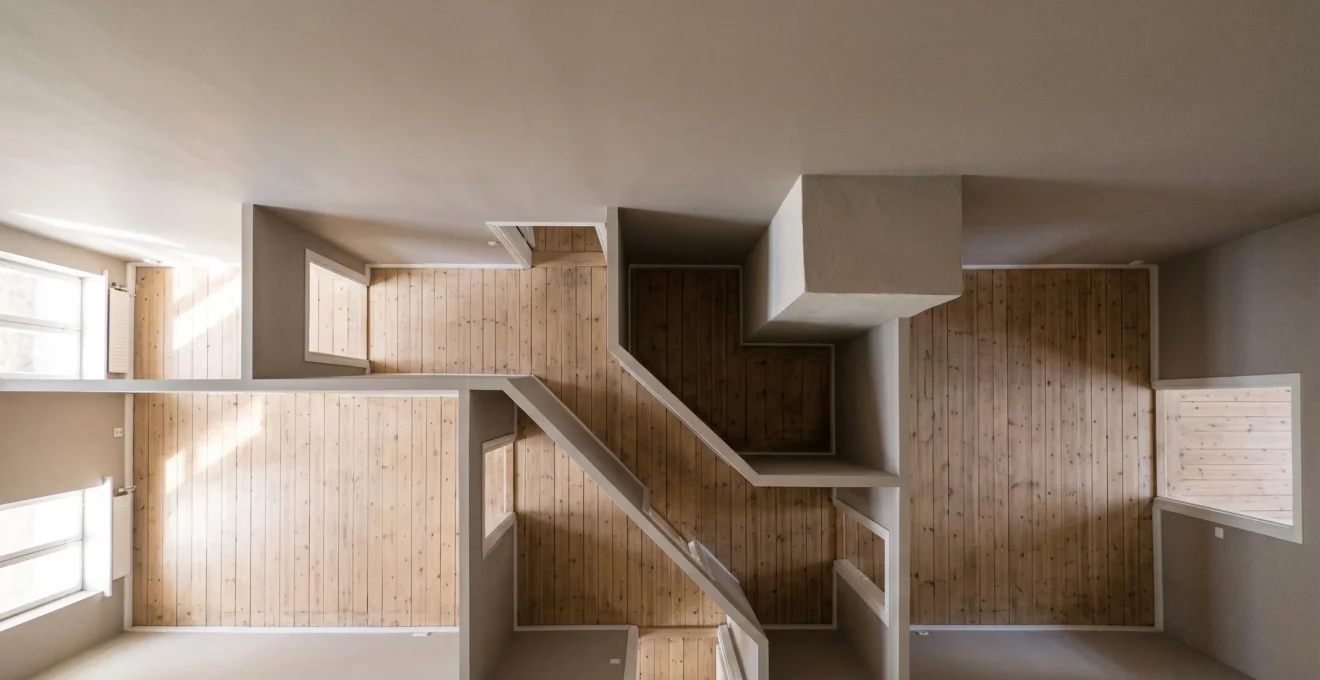
In summary:
- Floor plans are not just diagrams; they are diagnostic tools to uncover a property’s functional flaws and financial risks before a viewing.
- Key red flags include poor north-south orientation affecting light, inefficient corridors wasting space, and bathrooms located far from the main soil stack.
- Learning to identify “dead space” and verifying the advertised square footage can protect you from overpaying for unusable areas.
- Ultimately, developing “layout literacy” is a crucial act of pre-purchase due diligence that saves you from years of frustration and thousands in unforeseen costs.
For UK property buyers, the floor plan is often the first real encounter with a potential new home. It’s a document filled with promise, outlining the dimensions of a future life. Yet, most buyers give it only a cursory glance, checking room names and maybe the overall size. This is a missed opportunity, and a significant risk. The common advice—to check for storage or imagine furniture—barely scratches the surface of what a floor plan can reveal. It overlooks the subtle but critical clues to a property’s functional DNA.
The real value of a floor plan lies not in what it shows, but in what it helps you diagnose. It’s a forensic document that can expose poor natural light, inefficient circulation patterns that create “dead space,” and layouts that will inevitably lead to daily friction. More critically, it can signal major financial red flags, such as the need for a complete re-plumbing job or the fact that you might be paying for square footage that doesn’t truly exist. An inability to read a plan properly is the difference between a savvy investment and a frustrating, costly mistake.
But what if you could learn to analyse a floor plan not as a passive observer, but as a seasoned evaluation consultant? The key isn’t just to read the symbols, but to understand the story they tell about the home’s livability. This guide moves beyond the basics. It will provide you with a systematic method to dissect a layout, identify the hidden compromises that frustrate daily life, and spot the expensive problems that are invisible during a brief viewing. We will cover how to decode the plan’s language, assess light and flow, identify costly plumbing issues, and verify that the space you’re promised is the space you’ll actually get.
This article provides a structured approach to developing true layout literacy. By following these steps, you can confidently evaluate any property’s potential from its 2D drawing, empowering you to make smarter, safer, and more informed purchasing decisions in the competitive UK market.
Summary: How to Forensically Analyse a Property Floor Plan
- How to Interpret Floor Plan Symbols, Scale, and Room Labels in 5 Minutes
- Why Floor Plans Showing North Orientation Reveal Light Quality Issues
- Central Hallway vs Perimeter Corridor: Which Floor Plan Wastes Less Space
- The Bathroom on External Wall That Signals £8,000 Replumbing Costs
- When to Commission a Measured Survey Before Offering on a UK Property
- How to Identify the 15m² of Dead Space Hidden in Your Floor Plan
- How to Measure a Property Accurately in 20 Minutes With a Laser Measure
- How to Verify if Advertised Square Footage Matches Reality Before Exchange
How to Interpret Floor Plan Symbols, Scale, and Room Labels in 5 Minutes
Before you can diagnose a layout’s flaws, you must first learn to speak its language. A floor plan is a dense document, but its core elements can be understood quickly, providing the foundation for a deeper analysis. With Rightmove data showing that floor plans are considered essential by over 90% of buyers, achieving this basic literacy is non-negotiable. The goal isn’t to become an architect, but to swiftly extract the most critical information within the first five minutes of viewing a plan.
Start by locating the scale and dimensions. The scale (e.g., 1:50 or 1:100) tells you the drawing’s proportions, but the dimension lines running along the outside of the plan are more practical. These give you the real-world measurements of walls and rooms. Next, identify the standard symbols. You’ll quickly learn to spot different types of windows (bay, casement), doors, and the direction they swing, which is crucial for understanding usable space. Stairs are typically shown with an arrow indicating the upward direction.
Finally, read the labels carefully. Room names are obvious, but pay close attention to any stated area figures and abbreviations. Codes like ‘R.O.’ (rough opening) or ‘NIC’ (not in contract) can significantly alter how you interpret the usable space, especially in new-build or renovation projects. Mastering these fundamentals is the first step in moving from a passive viewer to an active analyst.
The essentials to locate first on any floor plan
- Locate the scale first (e.g. 1:50 or 1:100) to understand the proportional relationship between the drawing and real dimensions.
- Identify the dimension chains outside the floor outline, which show overall, centre-to-centre and detail measurements.
- Read each room label carefully: it typically includes a name and a stated area figure.
- Learn the short-form codes used on plans (e.g. R.O. for rough opening, NIC for ‘not in contract’) as they change how usable space should be interpreted.
Why Floor Plans Showing North Orientation Reveal Light Quality Issues
One of the most overlooked yet powerful symbols on a floor plan is the north arrow. Its presence is a gift, offering a clear insight into the quality and character of natural light the property will receive throughout the day. The orientation of a home fundamentally dictates which rooms feel bright and welcoming, and which remain cool and dim. Understanding this is crucial, as poor natural light can significantly impact your mood and a home’s overall atmosphere, a flaw no amount of interior decorating can truly fix.
In the UK, the sun rises in the east, travels across the southern sky, and sets in the west. This means south-facing rooms receive the most consistent and bright light all day, making them ideal for living areas and kitchens. East-facing rooms get bright morning light, perfect for bedrooms, while west-facing rooms enjoy warm afternoon and evening sun. North-facing rooms, however, receive only indirect, cooler light. They are often the darkest and coldest parts of a house, better suited for utility rooms, bathrooms, or studies where consistent, non-glaring light is preferred.
When you see a floor plan with a north arrow, immediately map this out. A living room with only north-facing windows will likely be a disappointment. A kitchen-diner with large, south-facing bi-fold doors, on the other hand, promises a bright, vibrant heart of the home. This simple check allows you to predict the “feel” of a space and spot a major potential deal-breaker long before you step through the front door.
As this image demonstrates, the difference between a sun-drenched space and a shadowed corner within the same home is stark. The north arrow on a floor plan is your key to predicting which rooms will benefit from this natural warmth and light, and which will be left in the cold.
Central Hallway vs Perimeter Corridor: Which Floor Plan Wastes Less Space
Once you’ve assessed the light, your focus should shift to the property’s circulation—how you move through the space. The efficiency of a layout is determined by its “flow,” and a primary culprit for wasted space is poorly designed hallways and corridors. You are paying for every square foot of the property, so space dedicated solely to transit is effectively “dead money.” Analysing the circulation network is key to understanding a layout’s functional DNA and its overall efficiency.
There are generally two types of circulation. The most efficient is the central hallway or landing. This acts as a hub from which multiple rooms radiate. Think of a traditional Victorian or Georgian layout with a central hall giving access to the living room, dining room, and stairs. This design minimises wasted space because the circulation area serves multiple destinations. The hallway is a multi-purpose node, not just a single-purpose path.
In contrast, the perimeter corridor is often far less efficient. This is common in conversions or poorly planned extensions, where a long, narrow corridor runs along one side of the building simply to connect rooms lined up in a row. This creates a significant amount of unusable square footage. This corridor serves only one function: to get from A to B. It cannot be furnished or used for any other purpose, yet it contributes to the property’s total area. When you see a long, featureless corridor on a plan, you are looking at wasted, expensive space.
Always ask yourself: does the circulation space serve one room or many? A layout with a compact, central hub will almost always feel more spacious and function better than one with sprawling, single-track corridors that eat into the livable area of your home.
The Bathroom on External Wall That Signals £8,000 Replumbing Costs
Some floor plan clues are not just about daily inconvenience; they are significant financial red flags. One of the most important to spot is the location of bathrooms, WCs, and utility rooms relative to the property’s main “soil stack”—the wide vertical pipe that carries all waste water down and out of the building. Its position dictates the plumbing layout, and moving it is a complex and expensive job.
In most UK homes, particularly older ones, there is one primary soil stack, often visible on the rear external wall. All toilets, sinks, and showers must connect to this pipe. The ideal layout clusters “wet rooms” (kitchens, bathrooms) as close to this stack as possible, and often vertically on top of each other in a multi-storey house. This is efficient, cheap to build, and easy to maintain.
When you see a bathroom on a floor plan that is on the opposite side of the house from the other wet rooms, an alarm bell should ring. This is particularly true for a bathroom on a “landlocked” internal wall with no easy route to the outside. This signals one of two things: either the plumbing solution is already long, complex, and potentially problematic (e.g., requiring noisy macerators or long, shallow pipe runs prone to blockages), or, if you plan to move it, you are facing a major renovation project. Relocating a bathroom can easily run to £8,000 or more once you factor in new pipework, chasing out walls, re-tiling, and making good.
The seemingly simple fixtures in a bathroom are supported by a complex and rigid infrastructure hidden in the walls. According to a breakdown of costs, just rerouting the pipes for a new toilet or sink can cost up to £900, before you even consider knocking down walls, tiling, or moving doors. Spotting a problematic bathroom location on the plan allows you to factor in this significant potential cost before you even make an offer.
When to Commission a Measured Survey Before Offering on a UK Property
The floor plan provided by an estate agent is a marketing document, not a legally binding architectural drawing. While often broadly accurate, discrepancies are common. For most standard purchases, a buyer’s own measurements and a healthy dose of scepticism are enough. However, in certain situations, commissioning a professional “Measured Survey” before you commit is a prudent investment that can save you from costly errors.
A Measured Survey is conducted by a chartered surveyor who uses precise tools like laser scanners to create a highly accurate set of drawings (plans, elevations, sections) of the property as it exists. This goes far beyond the simple GIA (Gross Internal Area) figure on an agent’s plan. So, when should you consider this step? The first trigger is if you are planning significant structural work or an extension. Your architect will require an accurate survey to begin design work, and getting it done early confirms the feasibility of your plans.
The second key scenario is when dealing with listed buildings or properties with unusual, complex shapes. Agent-drawn plans often simplify irregular angles and thick, uneven walls, which can hide major discrepancies in usable space. A professional survey provides the true picture. Finally, if your own rough measurements (as detailed later) show a significant variance from the advertised floor area, or if the layout seems highly improbable, a survey can provide the definitive answer. It acts as an insurance policy against overpaying based on inaccurate information, and provides a solid, factual basis for any potential renegotiation on price before exchange.
While it is an upfront cost, a Measured Survey provides certainty. It replaces marketing material with factual data, a crucial step when making one of the largest financial decisions of your life, especially if your plans for the property depend on precise dimensions.
How to Identify the 15m² of Dead Space Hidden in Your Floor Plan
One of the most common failings of an impractical floor plan is the creation of “dead space.” This is square footage that you pay for but cannot functionally use. It’s the awkward corner where no furniture will fit, the oversized landing that serves no purpose, or the space sterilised by conflicting door swings. Identifying this wasted volume is a core skill of layout literacy, as it helps you calculate a room’s true, usable area, rather than its misleading total footprint.
The most common cause of dead space is poor circulation planning. Look at the paths between doors in a room. If you have to walk diagonally across a living room to get from the hall to the kitchen, that entire pathway is effectively a corridor, making it very difficult to arrange furniture. Another major culprit is the door swing. A door that swings into a small room can make a third of the space unusable. Always check that there is clear wall space for doors to open against, rather than into the middle of a room.
Chimney breasts, awkward nibs of wall, and low-sloping ceilings in loft conversions also create pockets of unusable space. When looking at a room’s dimensions, don’t just multiply length by width. Instead, try to draw a functional rectangle within the room—the area where you can actually place furniture and move freely. Anything outside of that rectangle is likely to be, to some degree, dead space.
This image perfectly illustrates the concept—an awkward, shadowed corner that adds to the room’s total square footage on paper but contributes nothing to its function in reality. Learning to spot these zones on a 2D plan is like finding hidden money.
Your 5-step audit for hidden dead space
- Points of Contact: On the floor plan, trace the main circulation paths and mark all areas sterilised by door swings or awkward architectural features like chimney breasts. These are your primary dead space candidates.
- Collecte: Inventory your key pieces of furniture (sofa, dining table, bed) with their dimensions. Try to place them virtually on the plan within each room, avoiding the dead zones you’ve identified.
- Cohérence: Confront the layout with your daily routines. Is the path from the kitchen to the dining table long and convoluted? Is the main walkway through the living room right in front of the TV?
- Mémorabilité/Émotion: Identify the specific points of “flow friction” that are likely to cause daily annoyance. These are the parts of the layout that will grate on you over time.
- Plan d’Intégration: Based on your audit, decide if the dead space can be cleverly reclaimed with smart storage, or if it represents a fundamental, deal-breaking flaw in the property’s design.
How to Measure a Property Accurately in 20 Minutes With a Laser Measure
After analysing the estate agent’s floor plan, the next logical step is to conduct your own verification. You don’t need to be a surveyor to get a reasonably accurate measurement of a property’s internal area. With a simple laser measure (which is far more accurate and faster than a tape measure for this task), you can get a good sense of the property’s true size during a viewing. This is your first line of defence against the widespread issue of overstated square footage.
The process is straightforward. You are aiming to calculate the Net Internal Area (NIA) or at least a close approximation of the Gross Internal Area (GIA), which is the standard for UK residential marketing. The key is to be systematic. Go through the property room by room, including hallways, landings, and bathrooms. For each rectangular room, take a length and a width measurement, multiply them together to get the area, and add it to a running total. For L-shaped rooms, break them down into two rectangles and add their areas together.
Crucially, you must understand what to include and what to exclude. According to RICS standards, the GIA should include corridors, stairs, and toilets, but it typically excludes unconverted lofts, garages, and unheated conservatories. By following a simple, consistent method, you can build your own estimate of the property’s size and compare it directly to the figure advertised in the agent’s particulars. Any major discrepancy is a signal to investigate further.
To perform this check accurately, it’s vital to understand the different measurement bases used in UK property, as a detailed comparison from RICS standards shows. The table below clarifies the three main types.
| Measurement basis | What it measures | What it includes | Typical use |
|---|---|---|---|
| Gross External Area (GEA) | Total footprint measured to the outer face of external walls | Wall thickness, internal walls, columns, stairwells, lift wells, plant rooms | Planning, rating, council tax, build cost estimates |
| Gross Internal Area (GIA) | Area measured to the internal face of perimeter walls | Corridors, stairs, lifts, toilets, plant rooms, columns (strips out wall thickness) | Standard basis for UK residential floor plan marketing |
| Net Internal Area (NIA) | Usable space an occupier actually gets | Excludes toilets, plant rooms, stairwells, lift wells, permanent corridors, structural walls | Commercial lettings and retail valuations |
Your step-by-step guide to measuring a property
- Use a laser distance measurer to get the length and width of each room.
- Multiply length by width to calculate the square footage of each room.
- Add up all rooms, including hallways, landings and bathrooms, to reach a running total.
- As per standard practice detailed by guidance for UK home buyers, exclude the garage, any unconverted loft space, and unheated conservatories from the total.
- To move from Net Internal Area to Gross Internal Area, add the thickness of internal walls (typically 4–6 inches per wall) to your total.
Key takeaways
- A floor plan is a diagnostic tool: use it to assess light (via north arrow), flow (circulation), and spot financial red flags (plumbing).
- Wasted space is wasted money: learn to identify inefficient corridors and “dead space” created by poor layouts and door swings to understand a property’s true usable area.
- Trust but verify: always assume an agent’s floor plan may be inaccurate and conduct your own rough measurements during a viewing to check for major discrepancies.
How to Verify if Advertised Square Footage Matches Reality Before Exchange
The culmination of your analysis is the crucial act of verification. While estate agents operate under consumer protection regulations, the overstatement of property size on floor plans is a persistent and often costly issue for buyers. Assuming the provided plan is accurate without checking is a gamble you cannot afford to take. The discrepancy between the advertised area and the reality can have a significant impact on a property’s true market value.
This is not a theoretical problem. It’s a widespread issue that directly affects buyers’ pockets. Verifying the square footage is your final piece of pre-purchase protection, confirming that the asset you are buying is what it was represented to be. Failing to do so means you could be overpaying by tens of thousands of pounds.
Case Study: Widespread Overstatement of London Property Sizes
A revealing investigation by the measurement technology firm Spec provides stark evidence of the problem. After laser-scanning 304 London properties to precise RICS standards, they found that a staggering six out of 10 were overstated on agent floor plans. The average mismeasurement was 54 square feet—the size of a small box room. More alarmingly, one in eight properties was mis-measured by over 100 square feet. In one extreme case, a property marketed at 3,229 sq ft was found to be only 2,808 sq ft, a valuation difference of £263,546 at that property’s price per square foot.
These figures highlight the critical importance of due diligence. As one expert involved in the study noted, this is a serious and often unacknowledged issue in the property market.
“This is a great hidden scandal in the property market.”
– Anthony Browne, Senior adviser to Spec, quoted by Total Landlord Insurance
The lesson is clear: the floor plan is your guide, but your own measurements or a professional survey are your proof. This verification step, taken before you are legally committed at the exchange of contracts, is the final and most important act of a savvy buyer.
By integrating these analytical steps into your process, you transform from a typical buyer into an empowered analyst. You arm yourself with the layout literacy needed to look beyond the marketing and understand the true, functional reality of a property. This diligence is your best protection against future frustration and unforeseen expense. To begin applying these skills, the next logical step is to start analysing the floor plans on your current property shortlist with this new, critical eye.